
9 Considerations for Making 3D Models
Plus a brief history and description of the process
Have you ever wondered how your favorite animated movies and video games were made? Once the project goes into production, one of the first steps is to make all the assets with 3D modeling. Artists use specialized computer software to create a virtual model from a set of points in three–dimensional space.
This art process has become an essential part of many industries, particularly in film and art projects (the specialty here at Graphic Art Quest!), video game production, and product design. In this article, I will give you a brief history of 3D modeling and explain what it is. Finally, I’ll conclude with 9 considerations to keep in mind while designing your 3D objects, characters, environments, and other creations.
History of 3D Modeling
The history of 3D modeling traces back to the 1960s when Ivan Sutherland created the first 3D modeling program called Sketchpad. This program helped engineers create and manipulate complex designs on a computer and launched the Computer Aided Design (CAD) branch of 3D modeling. But CAD software has an engineering focus for uses such as making blueprints, and those needs differ from artists’. Having used both, I can personally attest.
The First 3D Movies
However, it wasn’t until the late 1970s and early 1980s that computer graphics technology advanced enough to allow for the creation of more complex 3D models. In 1972, Ed Catmull and Fred Parke (two of Sutherland’s students at the Department of Computer Technologies at the University of Utah) kicked off the animation revolution by creating the world’s first movie rendered in 3D.
The movie lasts just over 6 minutes and models Ed’s left hand shown rotating and flexing. When it premiered at that year’s SIGGRAPH conference, it was unbelievable. No one had ever seen anything like it before.
3D modeling continued improving during the 1980s and 1990s and saw more use in the film and computer game industries. Pixar Animation Studios, co-founded in 1979 by the same Ed Catmull of hand fame above, was one of the first companies to use 3D modeling extensively in their productions, releasing the first fully 3D rendered feature-length film, Toy Story, in 1995.
Technological Advancement and Spread to Other Industries
In the early 2000s, advancements in both computer hardware and software led to even more sophisticated 3D modeling techniques including physics simulations and real-time rendering. Technology continues to advance at a rapid pace.
Today, 3D modeling is an essential part of many industries both inside and outside of entertainment. Many commercials use 3D models because it’s easier and cheaper than filming with practical effects.
As another example, the medical community uses modeling, animation, and simulation to teach new doctors and train surgeons and technicians to perform complicated surgeries. A surgeon friend of mine assures me that acquiring real organs for the purpose is much more difficult.
Watching animations like Ed Catmull’s hand in modern times gives me a sense of awe at how far we have come.
What is Involved in Creating 3D Models?
3D modeling has many aspects to it. First, the artist or designer will create a rough sketch or concept of the object they want to create. Then, they will use specialized software, such as Blender (my preference), Maya, 3DSMax, or others to create a 3D model of the object consisting of digital polygons to give it shape. This mess of latticework is called the mesh.
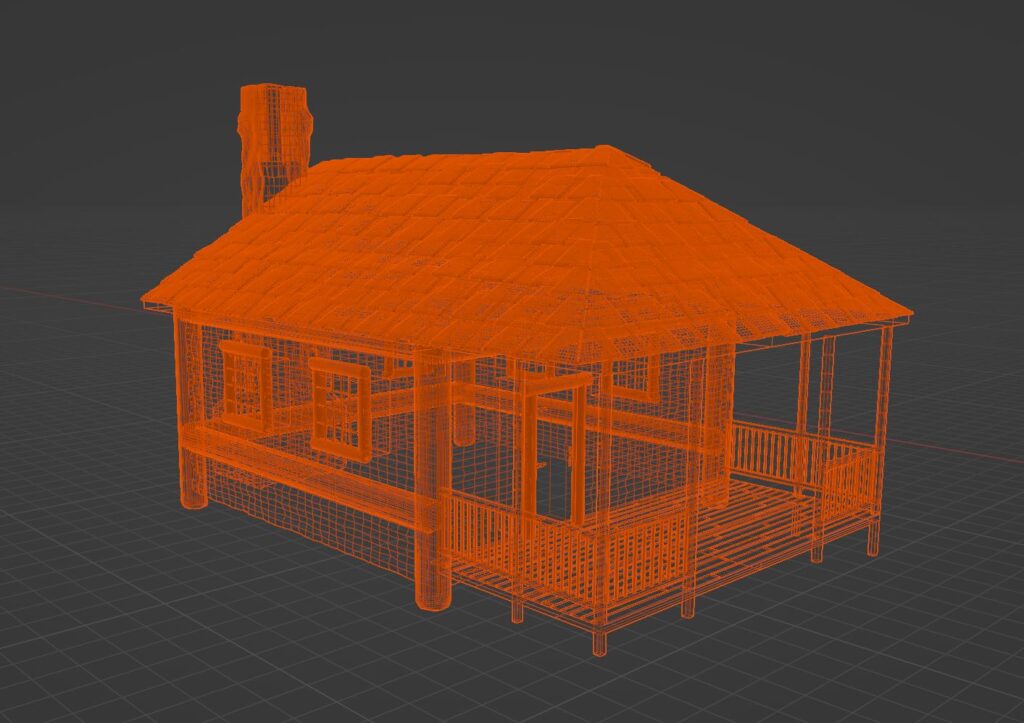
Once modeled, the artist adds textures and materials to create a realistic appearance. Riggers then apply bones to the polygon lattice to control how each polygon will move when animated. These affect both how the object looks and how it reflects, scatters, and absorbs light rays.
Later on, the models will get laid out, lit, animated, and rendered.
9 Considerations to Keep in Mind While Modeling Objects
When creating a 3D model, there are several aspects that you should keep in mind to ensure that the final product looks and functions as intended. Here’s a list for you to think about.
1. Detail
You have to add the right amount of detail when creating an appealing and realistic 3D model. Some things will just never get seen. Ed Catmull described in his book Creativity, Inc. how the Pixar team once had to intervene with some artists who were trying to make every painstaking detail perfect on objects that hardly even made the shot.
You have to know how the model will get used.
2. Accuracy
How accurate you make your model depends on the end result. For example, in photorealistic renders, the model should resemble the real-life object it’s based on as close as possible. In 3D movies, you tend to see more stylized characters because it’s easier to avoid the uncanny valley that way.
This requires you to thoroughly research and find reference materials to ensure the proportions, shapes, and textures to get the model as accurate as needed.
3. Scale
This is a more technical matter. It’s important to keep the scale of your 3D model in mind, particularly if it will be used in conjunction with other models or objects. At a minimum, make sure that the scale is consistent with other objects in the scene.
If you’re making models for others to use (say, in Blender), a good convention is 1 Blender unit equals 1 meter. Before exporting the model, apply the rotation and scale so it imports correctly.
4. Polygon count
The number of polygons used to create a 3D model can have a significant impact on its performance and appearance. High-polygon models can be more detailed, but they can also be more resource-intensive and slow down your computer. Low-polygon models, on the other hand, can be more efficient but may lack detail.
For example, I discussed in Creating My First Movie Using Blender – Part 1 how I included far more polygons in the ax model than I needed to.
5. Topology
Topology refers to the structure of the 3D model and how its polygons are arranged, and it’s crucial for proper animation and rendering. Clean and efficient topology allows for smooth animation and prevents bad mesh distortion and deformation.
Keeping in mind the polygon count discussion above, some places on a model will need more polygons than others once you go to rig and animate it, particularly around movement points. For example, a shoulder joint will need far more polygons than a forearm.
6. Texture and Materials
You don’t have to add a polygon for every single facet of your model because you can achieve many effects using textures and materials. Textures determine how the model will look and appear. Choose the right properties based on the object’s real-life characteristics or stylistic art choices.
Again, knowing how the model will get used makes a difference between if you should use a 512×512 texture or a massive 8K image.
7. Lighting
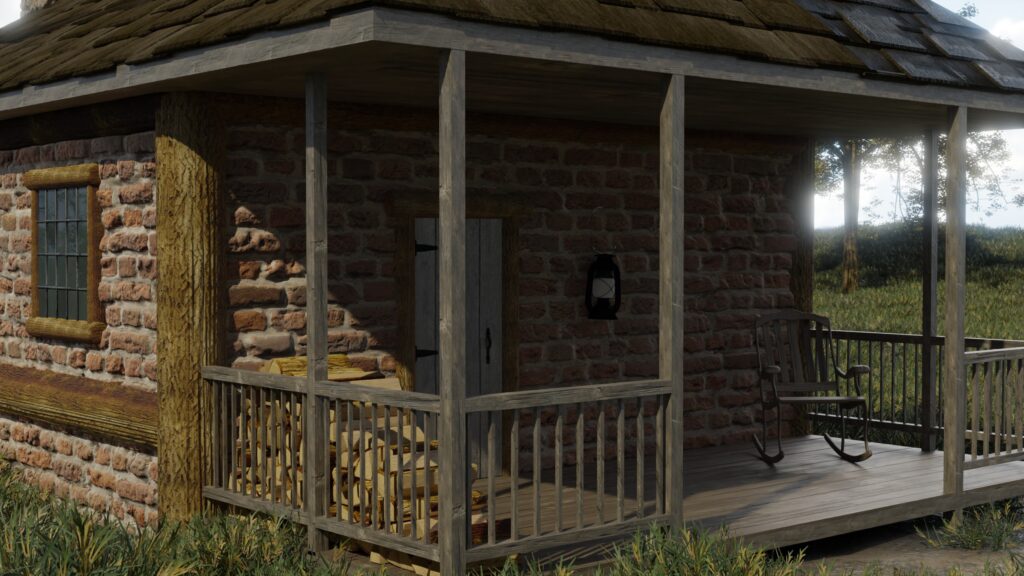
Lighting plays a significant role in the final look of a 3D model, especially if portions of the model will emit light. In the cabin above, the windows emit light to give the impression of a fireplace inside. As a result, I have the window pane bars separated just a bit from the window glass itself to allow a plane light to sandwich between them.
Consider the lighting conditions of the intended scene and adjust accordingly to create the desired mood and atmosphere.
8. Rigging for Animation
Rigging involves creating a system of bones and joints that allow the model to move realistically, while animation involves creating movement and action.
Not all models need bones. Nothing in A Cabin on the Plains had rigging because nothing needed it. They’re all static meshes and I achieved the animation effects using other techniques.
You should always keep in mind how your model will and needs to be rigged while you assemble the geometry.
9. Rendering
Rendering is the process of creating the final image from the 3D model after the computer calculates all the lighting bounces, reflections, scatters, and other effects in the scene. Some effects (like lens flare) are better to apply in postproduction than to try to create using 3D modeling, textures, or shaders.
Recognizing what you can create within the model and what should leave to other processes will elevate your art and improve your workflow.
Conclusion
Overall, creating a high-quality 3D model requires attention to detail, technical skill, and creativity. Keep these 9 aspects in mind as you create appealing, accurate, and entertaining models and bring them to life.
Do you have any other considerations for making 3D models? Please leave them in the comments!